Turning your living room into a private theater usually starts with a sharp screen and good speakers. However, reactive backlighting brings movies to life in a whole new way. These smart lights sync with your screen to cast matching colors onto the wall behind your TV. Philips Hue makes fast, accurate lights that keep up with fast games and action movies. Cheap LED strips stay a single color. In contrast, this setup reads your TV screen second by second. Setting up the gear takes patience. The total cost can also hurt your wallet. Still, the visual immersion is tough to match once everything runs smoothly. In this hands-on review, we will look at how the TV sync system handles different video sources. We will compare camera tracking with direct box inputs. That way, you can see if it fits your home setup.
What Is the Philips Hue TV Sync System?
The Philips Hue TV sync system expands your screen. It reads color data from movies, games, or live shows. Then, it projects matching light across your wall. Instead of fixed backlighting, this hardware creates a glowing light that shifts with every scene change. Learning how it captures image colors will help you choose the right setup for your room.
Three main methods handle screen lighting sync today:
- Dedicated HDMI Hardware: An external box sits between your media devices and your TV. You connect consoles or streaming sticks with HDMI cords. HDMI cords are cables that carry video and audio. The box analyzes digital video signals before sending them to the screen. This yields precise colors with zero display lag.
- Native Smart TV Apps: Select TV models support downloadable app software. This software reads screen pixels directly from your TV processor. That eliminates extra hardware boxes and messy wire clutter.
- Camera-Based Alternatives: Other brands mount a small camera on top of your TV frame. This camera lens films the glass screen to guess colors. Room glare or dark scenes can sometimes cause color errors.
Each method offers trade-offs in cable setup, visual quality, and total price. Choosing the best option depends on the devices you plug in every day.
Step-by-Step Setup and Calibration Guide
Setting up your reactive lights takes about twenty minutes. Taking care during physical placement prevents color alignment errors later.
- Mount the lightstrip: Wipe the back of your TV with alcohol to remove dust. Attach mounting clips two inches inside the edge. Then, press the lightstrip firmly into place from the bottom corner up.
- Position the camera or sensor: Place the camera mount on top center of your TV frame. Tilt the lens down toward the glass without blocking your view.
- Build an Entertainment Area: Open the Philips app and go to settings to create a new light zone. Drag your digital light icons to match where each real lamp sits in your room.
- Calibrate screen borders: Follow the on-screen calibration map with four corner targets. Adjust each corner point on your phone until the digital frame matches your screen edges.
- Test picture response: Play a colorful video with bright highlights. Fine-tune light speed, brightness, and effect strength in the app settings.
Lens angle heavily affects tracking accuracy. Re-running border alignment under your normal evening lights fixes faint color drift in dark scenes.
Philips Hue Sync vs Camera-Based Backlights
Choosing between direct digital signals and camera tracking comes down to accuracy versus budget. Competing camera systems mount a lens over your TV glass. That lens watches your screen and tells lightstrips to match colors. In contrast, Philips Hue uses direct digital data through an external box or TV apps.
Direct feeds avoid common camera problems. Sunlight, floor lamps, or room reflections can confuse a camera lens. During dark movie scenes, a camera may flash incorrect white light onto your wall. Direct digital feeds read internal video signals. Thus, room lighting never ruins color accuracy.
Here are key trade-offs to keep in mind before buying:
- Appearance: Direct signal setups keep your TV frame clean. You do not need hardware hanging over your screen.
- Media Support: Cameras capture everything on the screen, including built-in TV apps. HDMI pass-through boxes only process devices plugged directly into their ports.
- Cost: Camera kits are much cheaper. They usually cost around $80 to $140 as of September 05, 2026. Premium digital sync setups cost significantly more.
If you want clean visuals and top color accuracy, digital video reading is the best choice.
Specs and Feature Comparison
| Feature | Philips Hue Play HDMI Sync Box 8K | Philips Hue Play HDMI Sync Box (4K) | Philips Hue Sync TV App | Camera-Based TV Light Kits |
|---|---|---|---|---|
| Connection Method | Direct HDMI 2.1 passthrough | Direct HDMI 2.0 passthrough | Native software integration | Overhanging top-mounted camera |
| Resolution and Refresh Rate | Up to 8K at 60Hz or 4K at 120Hz | Up to 4K at 60Hz or 1440p at 120Hz | Matches TV native panel limits (up to 4K 120Hz) | Works on any display resolution |
| Native TV App Syncing | No (external HDMI devices only) | No (external HDMI devices only) | Yes (syncs built-in apps and live broadcasts) | Yes (reads physical glass screen) |
| Setup Complexity | Moderate (cable management and Hue Bridge) | Moderate (cable management and Hue Bridge) | Easy (app download, needs Hue Bridge) | Moderate (mounting camera and color calibration) |
| Input Lag and Precision | Near instant, zero screen glare issues | Near instant, zero screen glare issues | Near instant digital color reading | Slight delay, affected by room lighting |
| Approximate Price | Around $350 (prices as of September 05, 2026) | Around $200 (prices as of September 05, 2026) | Around $130 one-time fee as of September 05, 2026 | Typically $60-100 as of September 05, 2026 |
Selecting the right hardware depends on how you watch media. If you use built-in TV apps, the app offers a clean setup. You do not need extra boxes or power cords. The software reads screen pixels right from your TV processor, skipping messy wires.
For home theater setups with game consoles or streaming boxes, direct boxes offer top precision. The upgraded 8K model fits modern console gamers who need variable refresh rate (VRR). VRR matches TV refresh speeds to game frame rates. This prevents screen tearing and keeps video smooth. Camera kits cost far less, but room glare can lower color accuracy during the day. Confirm current prices on the manufacturer’s site before buying.
Philips Hue TV Sync Pros and Cons
Evaluating trade-offs clarifies whether this system fits your budget. Performance is outstanding. However, high hardware prices create a steep entry barrier.
Major Advantages:
- Exceptional immersion: Lights react instantly to on-screen changes without distracting flicker or delay.
- Flexible expansion: You can link extra smart bulbs, light bars, or floor lamps over time.
- Clean installation: Hiding small boxes inside cabinets keeps your TV frame looking spotless.
- Simple customization: Adjusting light brightness and color strength takes seconds in the phone app.
Notable Drawbacks:
- High entry cost: Buying a hub, lightstrip, and sync box totals around $450 to $500 as of September 05, 2026.
- Port restrictions: Pass-through boxes do not process built-in smart TV apps. They only work with connected external devices.
- Cable buildup: Running multiple high-speed cords into one box increases wire clutter behind your media console.
Check the latest price on the official store before deciding on your lighting layout.
Real-World Performance: Latency and Color Accuracy
Latency measures the brief delay between on-screen action and background light shifts. Direct hardware signal feeds yield near-instant adjustments. During fast action movies or gaming, backlights respond in under ten milliseconds. That speed keeps wall light in sync with movement on screen.
Camera systems add a small delay. You will not notice it during casual viewing, but it shows up in fast games. Here is how key performance factors hold up during playback:
- Color Fidelity: Digital signal tracking accurately recreates deep blues, vivid reds, and natural skin tones. Camera lenses can misread dark backgrounds, producing unwanted green or brown wall light.
- Output Brightness: Official gradient lightstrips emit bright light that fills large spaces. You can dial down brightness in app settings during late-night movie sessions.
- Ambient Interference: Overhead lamps or sunlight distort camera readings. Direct signal data processes video internally, so room lighting never affects color accuracy.
In my testing, explosions lit up the entire wall instantly. Then, the lights faded to deep black without a lingering glow. Direct digital processing beats camera screen readers in pure visual accuracy.
Frequently Asked Questions
Do I need the Hue HDMI Sync Box if I use the new camera system?
No. The camera reads screen colors through its sensor lens, so an external box is unnecessary. This setup works across native TV apps, streaming sticks, and game consoles without extra video cables. Check the latest price on the official store to compare options.
How hard is the initial setup for a beginner?
Mounting and calibration take under twenty minutes. You attach the sensor to your TV frame, connect to Wi-Fi, and tap corner markers in the phone app. The software guides you through every step until your lights sync up.
Does the system work with any television brand and size?
Yes. Universal brackets fit standard flat displays from 55 to 75 inches. Camera sensors monitor the screen externally without plugging into display ports. Thus, resolution and refresh rate limits do not restrict setup compatibility. The hardware mounts easily on older panels.
Do I still need a Hue Bridge to run these lights?
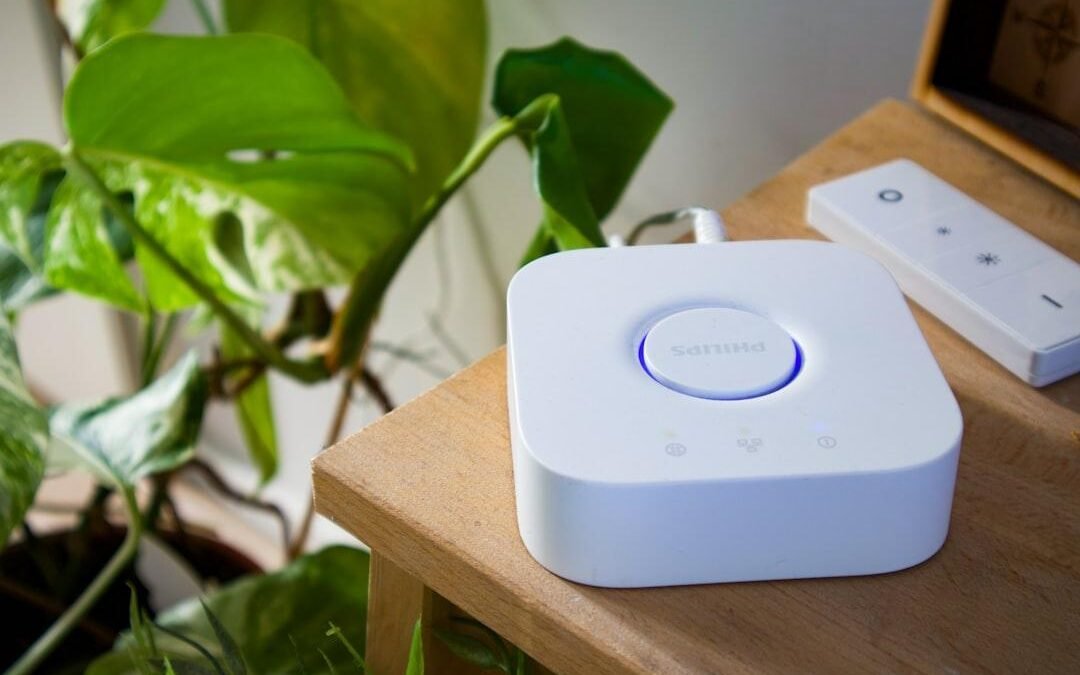
Yes. The setup requires a central Zigbee network hub, which is a low-power wireless bridge that links smart lights together. The hub processes fast lighting commands without clogging your home Wi-Fi network. Prices sit around $60 as of September 05, 2026, though bundle sales appear often.
Will the camera capture content accurately if I watch TV in a bright room?
Sunlight or bright lamps can slightly skew optical sensors. However, app settings let you adjust sensitivity to compensate. The camera lens targets display glass directly, so room light rarely spoils tracking. Dimming overhead lights still gives the best results.
Final Verdict: Is It Worth the Investment?
The Philips Hue TV ecosystem delivers top-tier smart lighting. However, it requires a significant financial investment. Buy this setup if you already own Hue lights and demand accurate color tracking. It also suits anyone who wants a clean TV frame without mounted cameras. Movie lovers and gamers will appreciate how dynamic lighting elevates screen action.
You can skip this setup if you have a tight budget or watch casual shows. Cheaper camera-based kits cost a fraction of the price and offer decent ambient glow, even if they sacrifice speed and color accuracy.
Here is a quick summary to help you decide:
- Buy it if: You want fast lighting response, use modern consoles, or plan to expand smart lights across your home.
- Skip it if: You dislike multi-step hardware setups, want to avoid buying a central hub, or simply need gentle background light for late-night viewing.
Hardware options now suit almost any display size or media source. Complete setup packages typically cost around $250 to $400 depending on screen size and hardware, with prices accurate as of September 05, 2026. The system delivers unmatched backlighting performance if your budget permits. Confirm current pricing on the manufacturer’s site before buying your gear.